This is part three in a series on starting your own website. Setting up email hosting for your own domain gives you extra credibility. Plus, there are some new tools that make email setup easier than ever. Email delivery is even more important if your website will be sending emails to customers or potential clients. Some folks might skirt right on by this topic. However, if you are setting up a site for a business, using your own domain for email is essential.
Some web hosts will include free email hosting, but often the web-mail options they provide are a little lackluster (anyone remember SquirrelMail?). The unfortunate reality is that this might cause you to ignore your business email, and in the process you end up losing potential customers.
Basics of Email Hosting
What we’re talking about here is being able to use an email like sam@sammydesign.com rather than sammy.design@gmail.com. There are two sides to this coin, sending email (delivery) and receiving email (hosting). When it comes to sending email, that is generally handled by the same folks who host your email. However, if you need to send email from your website, that can quickly become a complicated affair.
First, we’ll cover a few popular options for email hosting. Then we’ll look at how you can send emails from your website and not end up in the spam folder.
Hosting Email with Zoho
Whether your web host doesn’t include email hosting, or you’re not happy with the web-mail client your web host offers, Zoho is a great free option.
When you signup for Zoho, you start the signup with your own personal email address. You can also use any email address NOT under the domain we’re setting up currently. Once you have your Zoho account created, then you can add “Workplace Mail” to get going with your own domain.
Before you can add a Workplace app though, you have to confirm your email via the link they send you. That might take a bit, so if things are acting squirrelly, just give it a few minutes and try again.
Once your email and account are verified, then you can add Workplace apps to setup email for your “business” with your own domain. Of course Zoho offers paid options, but I’d start out with the free plan and you can always upgrade later.
Zoho Domain Verification
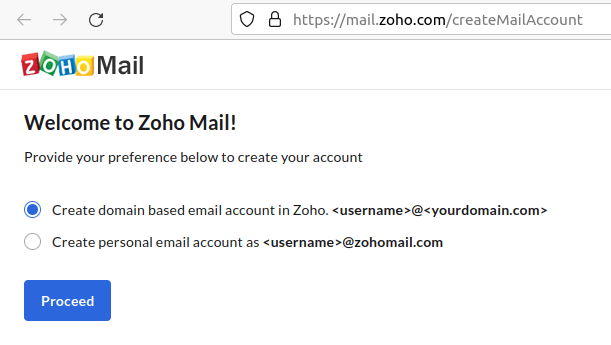
During the setup, you’ll first need to tell Zoho that you want to use your own domain rather then something@zohomail.com:
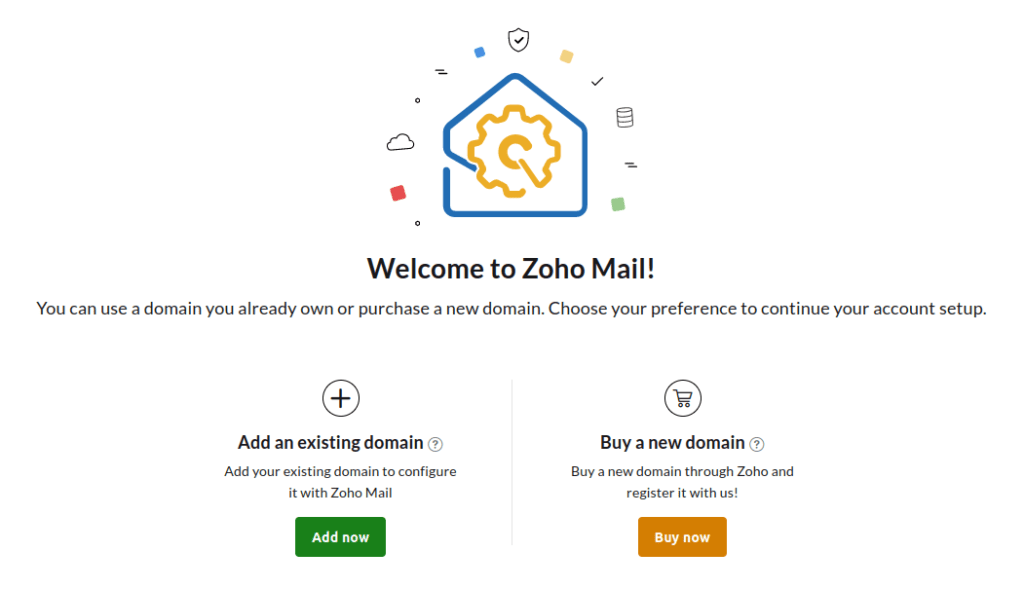
If you have your own domain registered already, then you can just add an existing domain to your account. Otherwise, you can register your domain through Zoho, but I can’t say that’s an option I would recommend.
Enter your domain name (don’t mind the ‘www.’ as that’s irrelevant for email), and your organization details to proceed to the domain verification step.
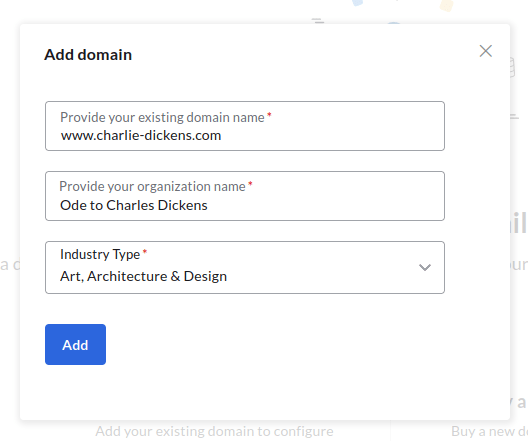
Zoho will attempt to detect your domain registrar, and in my case they guessed right. They even offered a handy little video to assist in the verification process. Domain verification is partially for “security” reasons, since they don’t want to enable you to send email from a domain you don’t own. However, it’s also to make sure you know what you’re doing. Otherwise, if you can’t access your DNS records, you’re going to be spinning your wheels here!
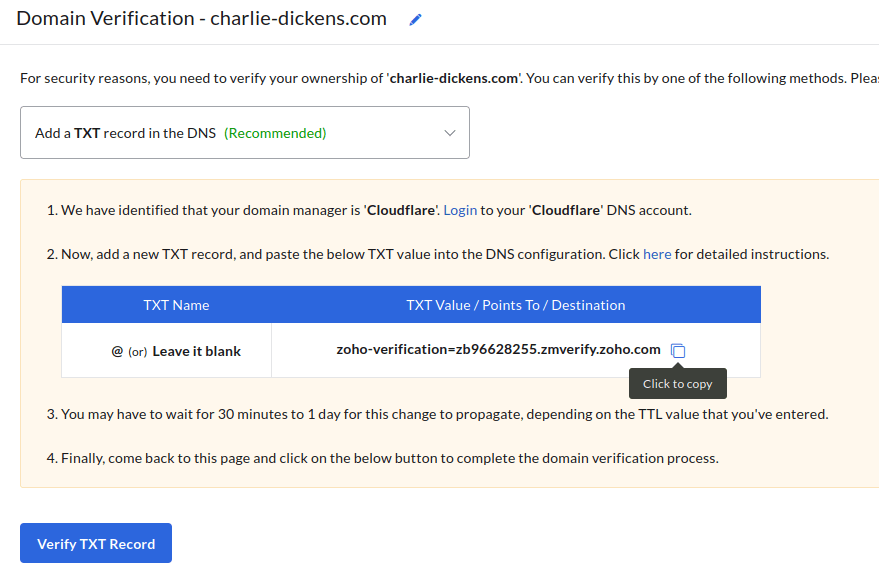
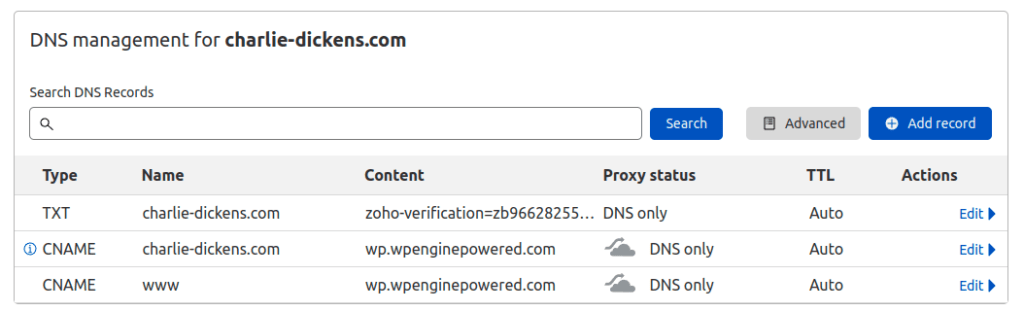
To verify our domain, we head on over to our DNS control panel. That might be with Cloudflare, our web host, or a company like Namecheap. All DNS records have two parts: a Name and the Content for that record. When it comes to email, the Name will usually be ‘@’, which indicates the root of the domain. That is, unless we decide to use a sub-domain for our email addresses, which is possible, but somewhat rare.
We enter @ for the name on Cloudflare, and then copy the TXT Value from Zoho into the Content field. While Cloudflare is pretty snappy about “propagating” DNS records, sometimes this can take a while. So I’d give it a couple minutes before hitting that Verify TXT Record button in Zoho.
Zoho Domain Setup
After your domain is verified, you’ll be able to create your main admin email account, and any others you need. Of course, you can come back and do other accounts later. We’ll skip Groups setup, as we just want to get our email going.
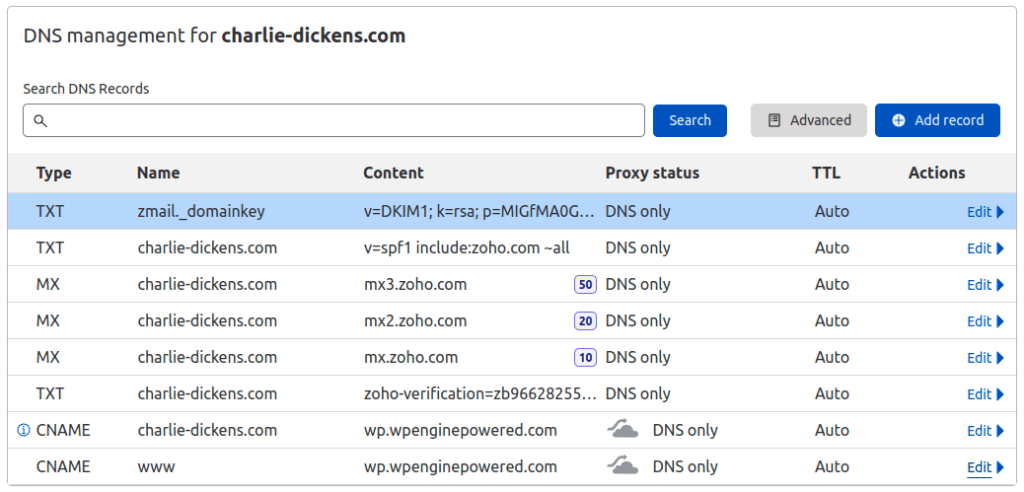
To complete the domain setup, we need to create a few more DNS records:
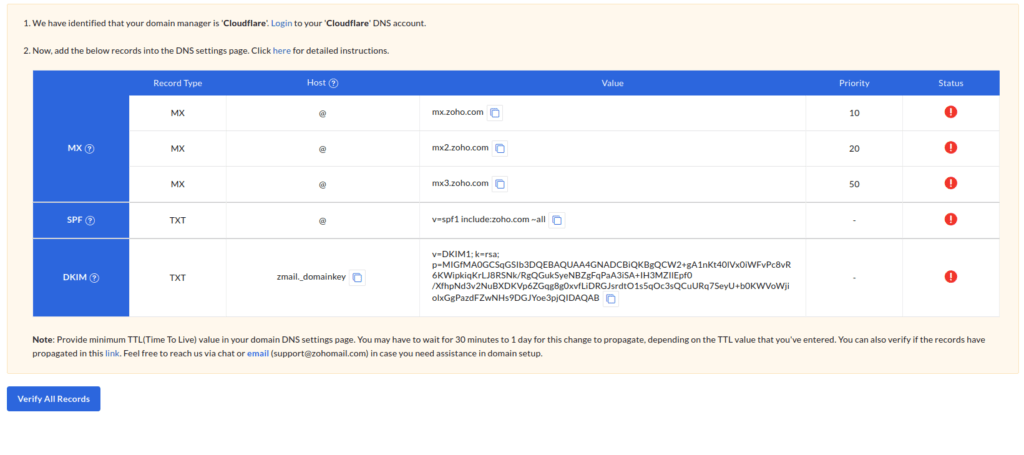
These come in three flavors, and I particularly appreciate that they provide you with SPF (Sender Policy Framework) and DKIM (DomainKeys Identified Mail) records right from the start. The MX (Mail eXchange) records tell other email servers where to deliver email for your domain. Without those, nothing sent to mail@your-domain.com will ever arrive.
The SPF and DKIM records serve several purposes: First, they help prevent unauthorized people from sending email using your domain. Second, they give your domain more credibility. When an email provider can verify that your emails came from an authorized source, they’ll give your emails a better/lower spam score.
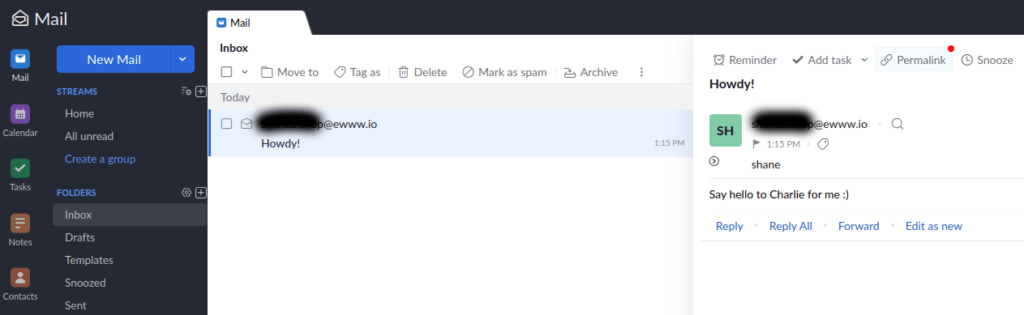
Once those records are verified by Zoho, you’re pretty much done, even though Zoho has a few more optional steps in the process. However, if you’re moving from another email provider (or your web host’s free mail service), it might take a while before emails start showing up in the right place. Some servers are slow to pick up on DNS record changes, and it can take 24-48 hours before those slow pokes catch up with everyone else.
Hosting Email with Google Workspace
While this is essentially Gmail with a custom domain, you probably already know Google has a lot more apps than just search and email. So one of the things that might push you to use Google Workspace is the plethora of apps you get access to under your domain. Since Adam and I are 17 hours apart, we make good use of Google Chat and Google Meet!
Google’s Workspace setup starts a little different than Zoho’s signup. Instead of providing a personal email, you’ll first create your Google account using the username and domain that will also be your new admin email for Workspace.
Domain Verification with Google Workspace
From there, the next thing you’ll need to do is similar to what we saw with Zoho. You have to verify your domain using DNS TXT records to prove that you actually own/control the domain. One nifty feature with Google is that they have automatic verification with Cloudflare. But for all the sad folks not using Cloudflare (I kid, I kid!), I’m going to show the TXT record method instead.
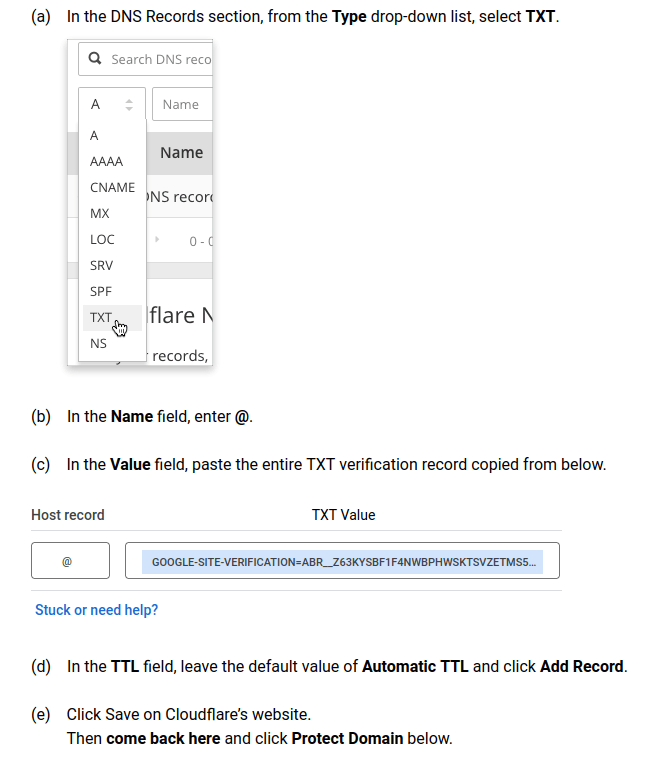
In case you skipped the Zoho section, we have to enter @ in the Name field, and put the TXT Value in the Content/Value area. Once we save the records with our DNS provider (or domain registrar, or web host), give it a minute before attempting to verify the record. While most DNS providers are pretty snappy these days, there are times when these things aren’t exactly instant.
If it takes longer to verify, you can keep going with setting up more user accounts (if you need them). Google will continue to check for that TXT verification record in the background.
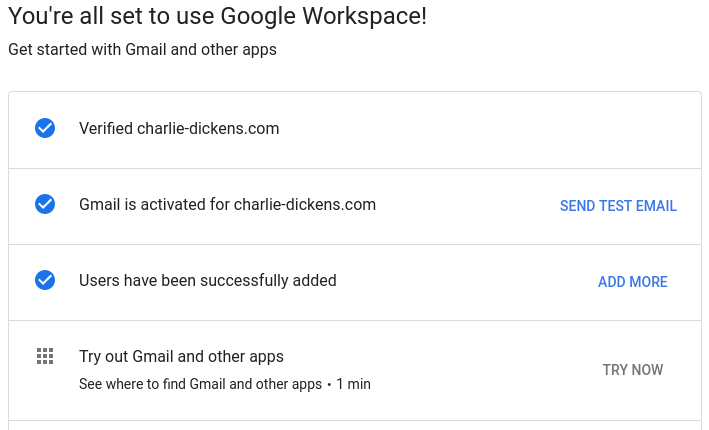
Domain Setup with Google Workspace
Then, once your domain is verified, we need to setup those MX (Mail eXchange) records so that other servers know where to deliver our email.
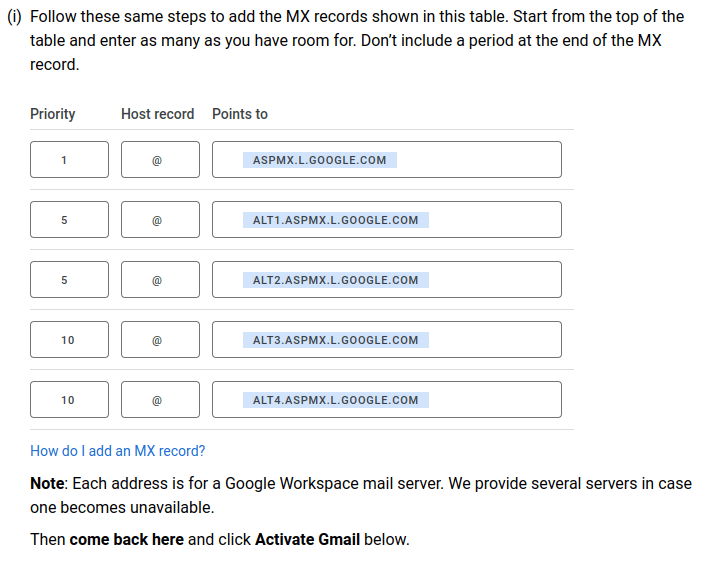
Google is a bit of an overachiever, and gives you 5 MX records, because they provide extra servers “in case one becomes unavailable”. That’s really several clusters of servers, as they have hundreds (if not thousands) of mail servers.
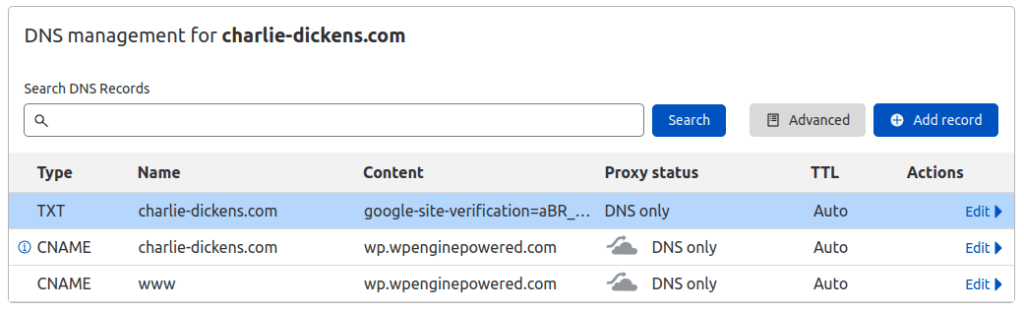
One thing that really surprised me, is that Google doesn’t offer any SPF or DKIM records during setup. They do have those available though, and I’d recommend setting up SPF and DKIM to help keep your emails out of spam folders. At any rate, here’s what we end up with in our DNS records:

Once Google verifies your MX records, they’ll also remind you that it could take up to 48 hours before you start receiving email in Google Workspace/Mail. That partially depends on whether you had existing MX records, and the TTL (Time to Live) of those old MX records.
In any case, once you’ve gotten this far, you can at least send emails using your new email. In most cases, you’ll be able to receive them pretty quickly too.
But there’s another way!
Oh sure, Google Mail and Zoho are great, especially if you want to keep your business email separate from your personal email. But, what if you wanted to just forward your-name@my-business.com to a gmail.com address? Or maybe you have multiple domains and you’d rather not be checking email for all of them?
Well, if you’re using Cloudflare for DNS, it couldn’t be any simpler with their new Email Routing feature. Cloudflare Email isn’t email hosting, it’s email forwarding, to any email address you already own. This is a great way to make sure you don’t miss a potential client if you forget to check your business email!
Cloudflare Email Setup
Similar to Zoho and Google, there are MX and SPF records to add, but since Cloudflare is both DNS and Email provider here, you can just have them do it for you.

Once the MX records are setup, you need to add and verify a Destination Address (you can have multiple if you like). Once you have a destination for your emails, then you can start creating custom addresses using your domain and forward them to whichever destination address you’d like.
You can’t send emails using Cloudflare (yet), though they have an Email Workers feature in beta that looks promising. So let’s move on to sending emails.
Email Delivery
Sure, if you’re using free email from your web host, or you’ve now setup Zoho or Google Mail, you can send email right from their site. What else could you need?
Well, if you’re just running a blog site, maybe nothing… However, if you need to send email from your website to customers, that’s a whole different story. You may need a way to send order confirmation emails or password reset emails for customer accounts. You might have a contact form and want to actually send those messages to your email. All of that is “transactional” email, and to send transactional email through your website, you need an ESP. By the way, that’s an Email Service Provider, no mind reading required!
I’ve already covered the wild and exciting world of ESP’s for sending transaction email, so I won’t rehash all that. You can certainly start out with a free provider, but I use Postmark because their delivery rates are second to none.
Oh, but how in the world do you setup an ESP with your website? Ah, now that’s a fine question, I’m so glad you asked!
Email Plugins for WordPress
Some ESPs have their own plugins, and Postmark is no exception here. It’s also easy to setup, so I won’t waste your time with the details… However, if you’re wanting to send from multiple addresses or use some other ESP, the FluentSMTP plugin is a great choice.
The best part of FluentSMTP is that it is also easy to setup. There’s literally only 4 things you have to choose/enter, and then you’re done. Yes done!
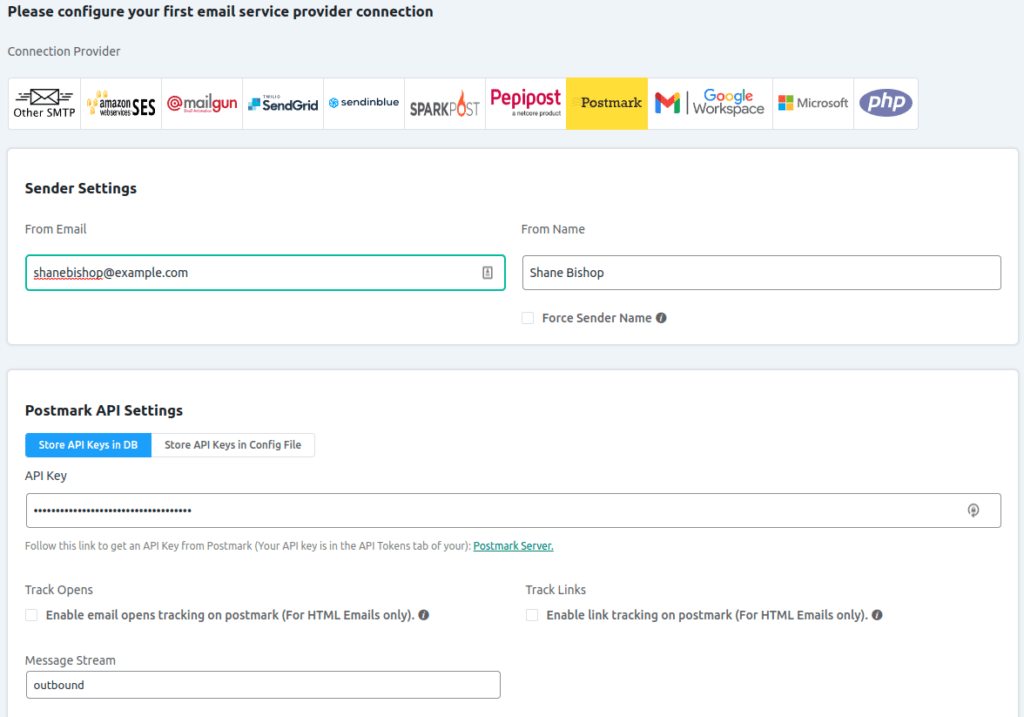
Choose your ESP from the list, enter your sender settings, add your key information for your email provider, and then get on with doing something else more fun!
Recap
What, you wanted more? Alright, well even though email hosting and delivery isn’t the most exciting topic, it’s one I’ve spent way too much time on over the years, at various jobs. Now you can use your custom domain to make your emails look more professional AND keep those emails out of spam folders.
Well, I can’t guarantee you’ll stay out of spam folders… However, if you want to take things just one step further, I recommend checking out DMARC. It allows you to set a policy for what should happen when SPF and DKIM verification fails and helps you stay on top of email delivery issues.